Add a user
User is a person who has access to the Client Control Panel, authorized to perform actions in accordance with the assigned role.
The users of the Client Control Panel are not associated with the users of the services that you purchase.
You can grant access to the Client Control Panel to your company’s employees.
Getting started
To add a new user, send an invitation via the Client Control Panel. After that, the user should complete the registration process using the link from the invitation.
To send an invitation:
Open the Client Control Panel (https://th.noventiq.market/client) and go through authorization process.
Click the account name at the header ➀
Select the account to which you want to add the user from the drop-down menu ➁

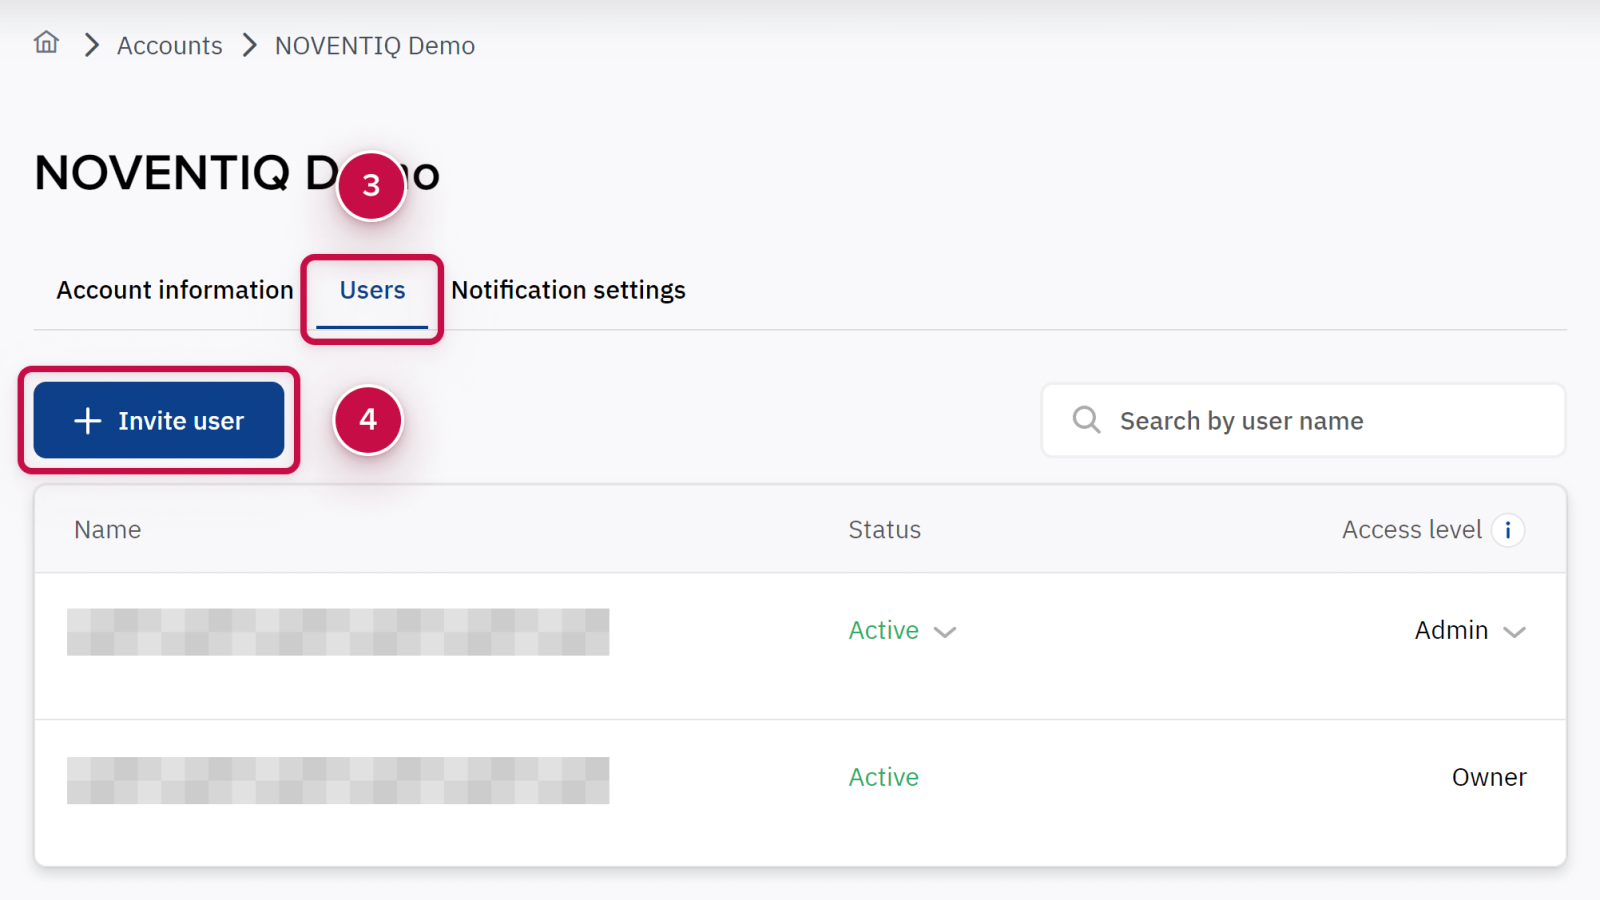
Click the button Users ➂ in the top menu. The section contains a list of users who have access to the account and their roles.
Click the button Invite user ➃ to initiate adding of a new user.

Filling out the user invitation form
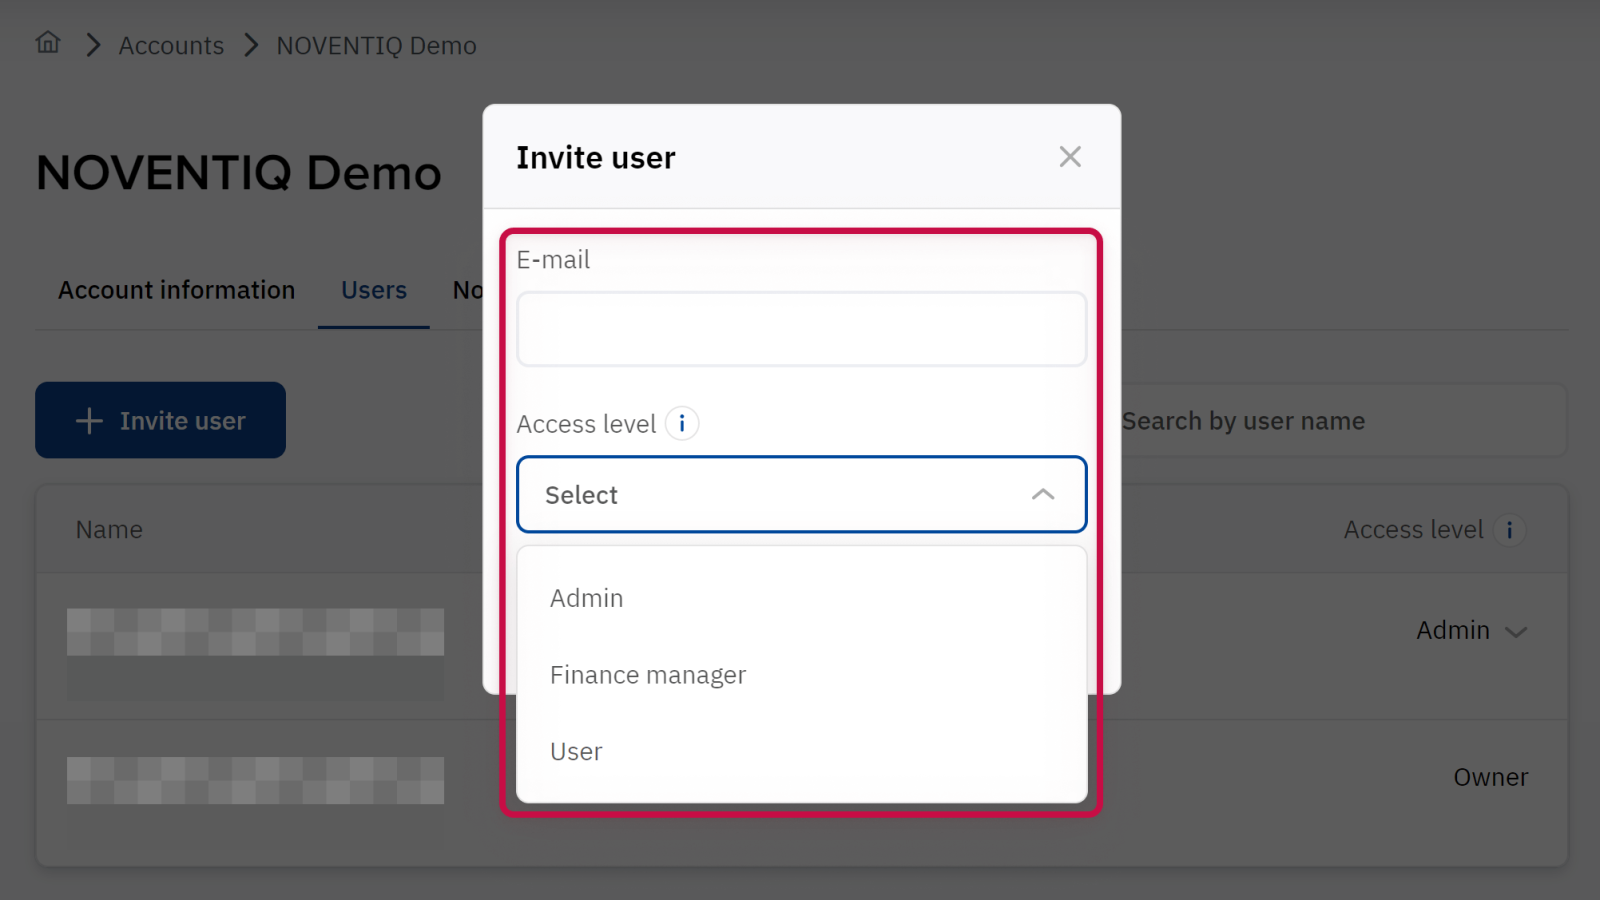
After clicking on the Invite button, a window for inviting a new user will open:
Fill in the form fields:
Specify the list of e-mail addresses of users that you want to register in the Client Control Panel. Use a space, "," or ";" to separate e-mail addresses.
Choose the access level that you want to grant to the invited users:
Administrators have access to all operations except owner management.
Finance managers can make payments, update account details, and generate analytics reports. They have read-only access to all sections except the Service Management section, which is available only to administrators and the owner.
Users don’t have access to the sections of the Client Control Panel, but they can receive notifications on financial issues (it is necessary to grant them the right to receive this type of notifications).
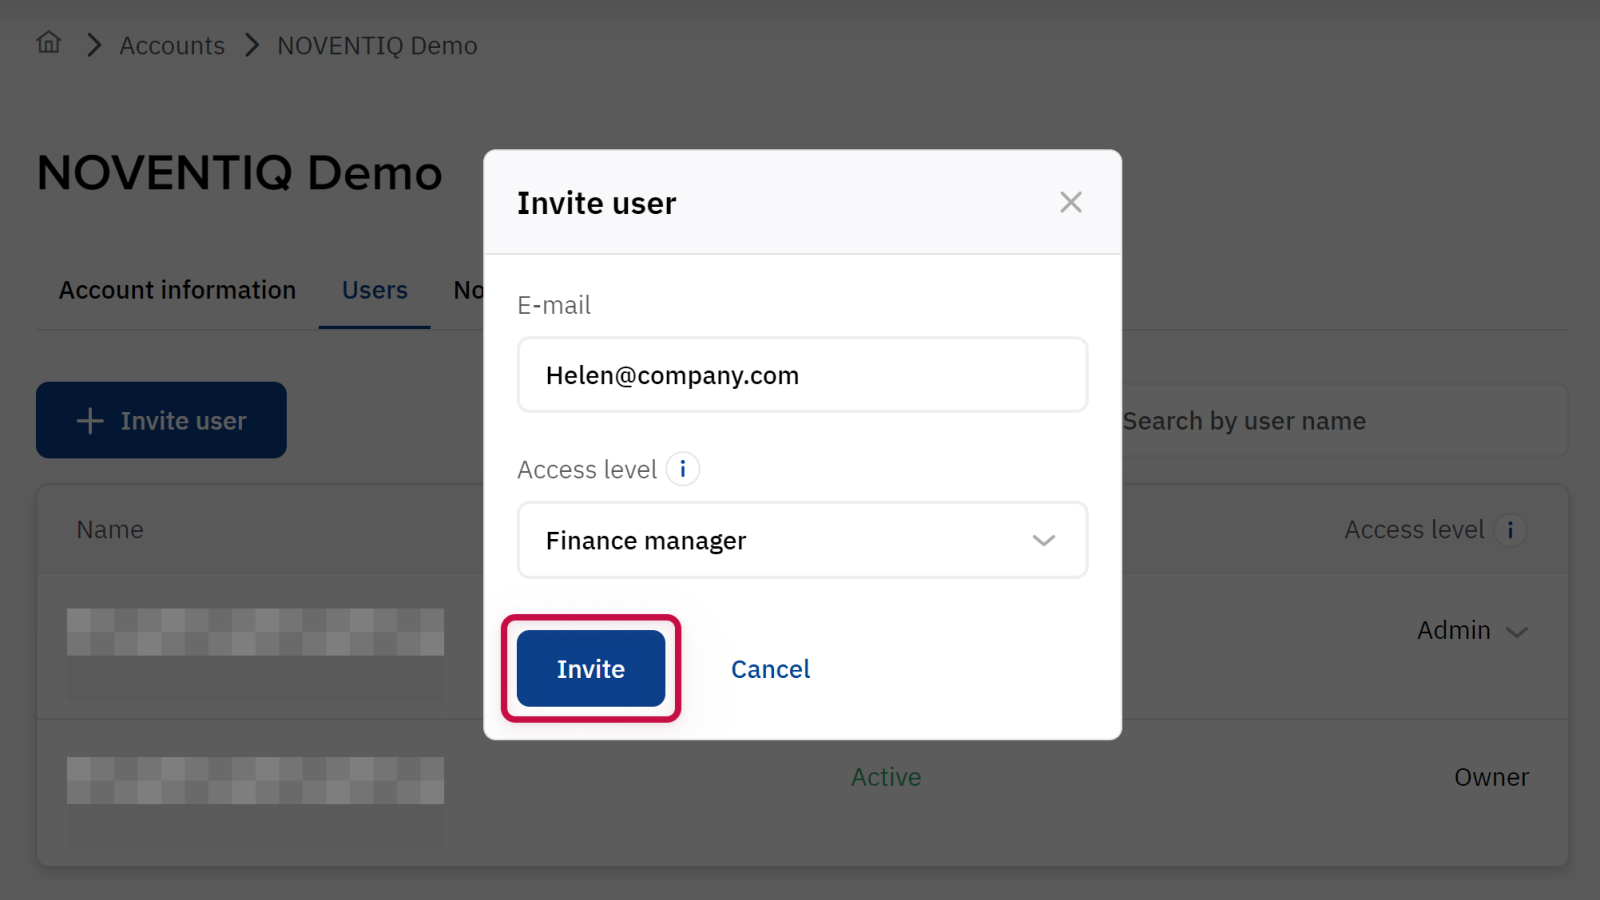
Click button Invite.


Accepting the invitation and completing the registration
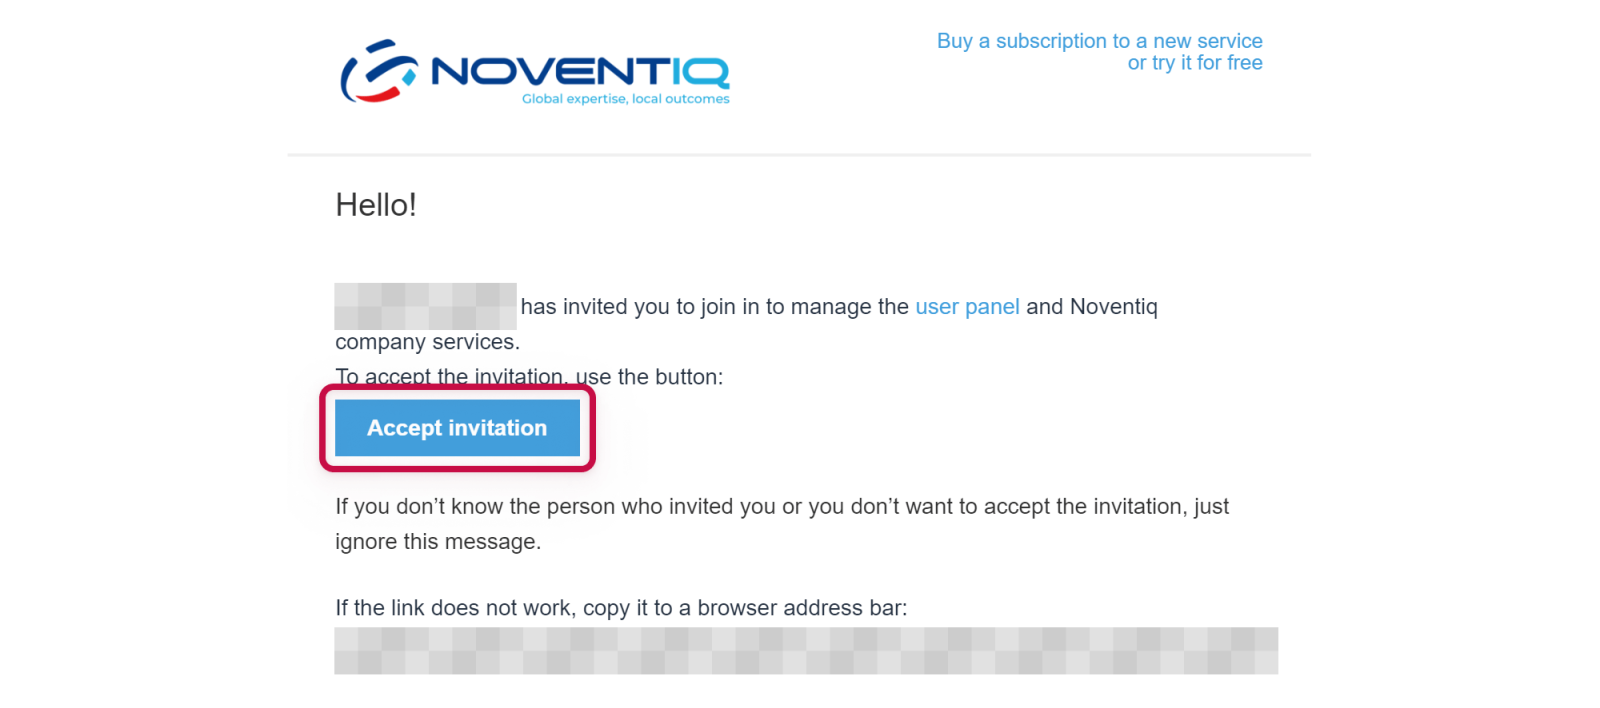
Letter with the subject Invitation from the user… with offer to join to Client Control Panel will be sent to mentioned e-mail addresses after you send the invitation.
The invited user should click on the button Accept invitation in the email.

After clicking the button Accept invitation in the letter, the registration page will be opened.
Then the user should:
Complete the registration form.
Receive a letter and confirm the email address to complete registration.
For details, see Registration.
After performing all the actions, the user will have access to the Client Control Panel in accordance with the assigned role.
Noventiq Market Thailand
Customer Support | |
Microsoft Technical Support | |
Client Control Panel | |
Catalog |
